 IMPORTANT UPDATE:
Whether you acquire your free permit online https://www.adfg.alaska.gov/Store/
or from your local Alaska Department of Fish & Game office,
you will receive the two page permit seen below:


You will also receive the following two information sheets:


Do you have any questions or concerns about the ADF&G shrimp regulations?
I encourage you to visit or contact the Sitka office: 907 747-6688. The staff is receptive and informative.
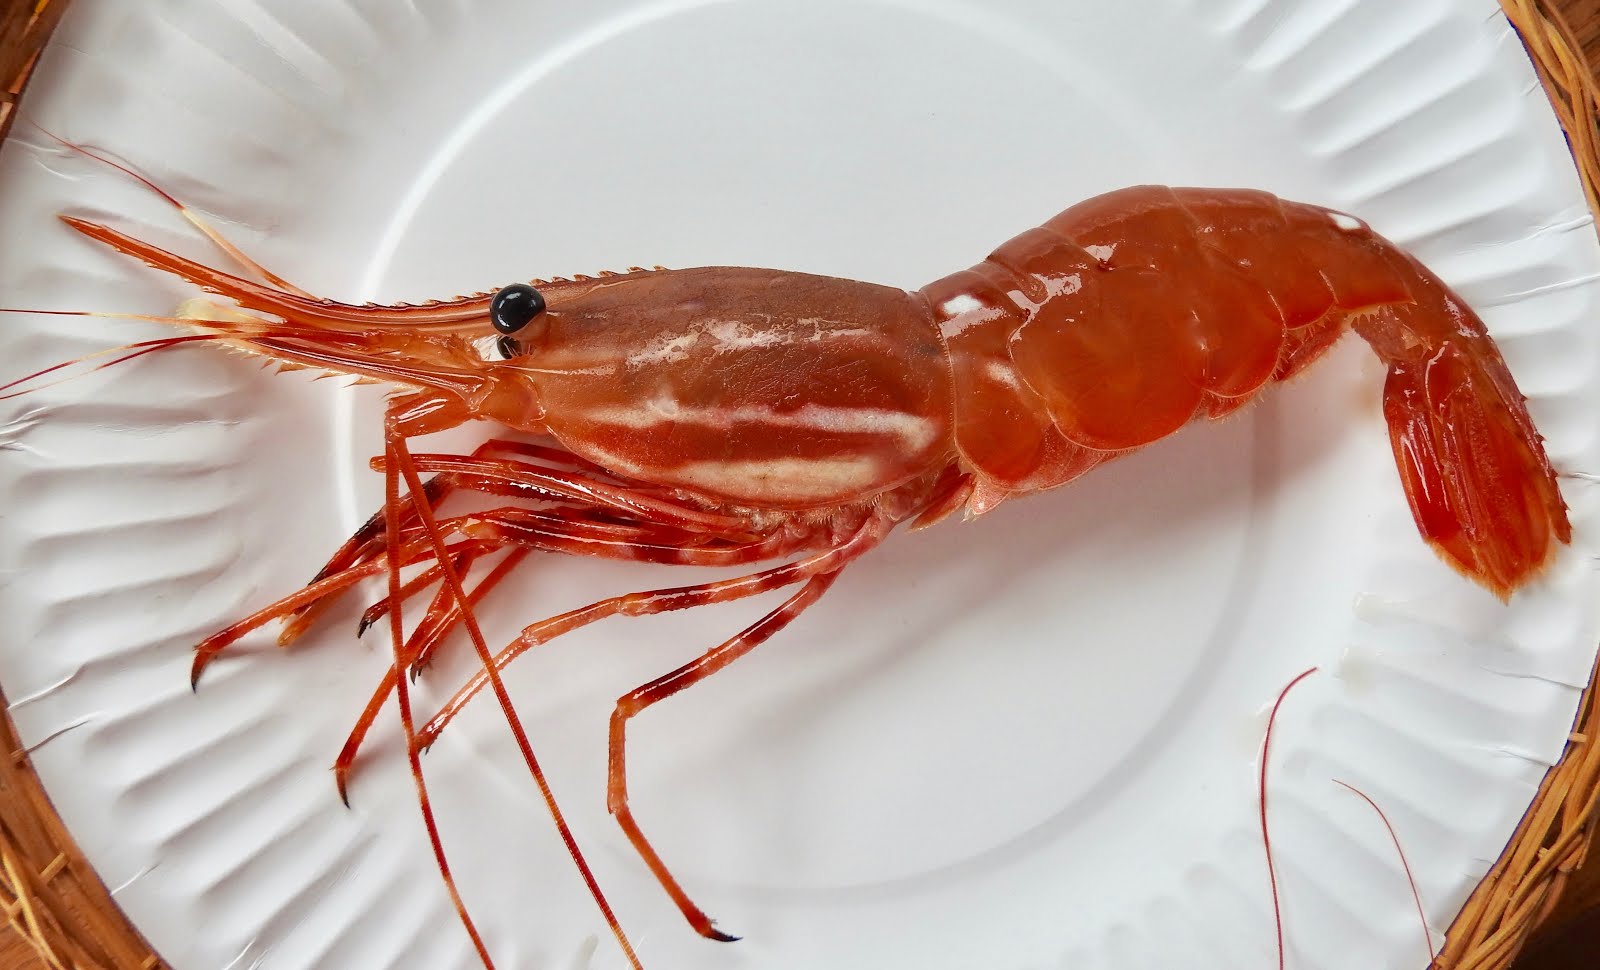
If you have ever been scuba diving or snorkeling in the Pacific Northwest...
 |
| photo by Hope Merritt |
These bizarre, spineless creatures are separated into groups called phyla. Shrimp are in the phylum named ARTHROPODA. And what a cast of characters make up Phylum ARTHROPODA!
The bodies of arthropods are encased in a protective, chitinous exoskeleton or shell. There are well over 2000 species of arthropods living in the marine waters of the Pacific Northwest including all kinds of barnacles, crabs, fleas, lice, mites, pill bugs, sea spiders and shrimp!
How many species of shrimp exist? From what I have read, there are thousands of species of shrimp worldwide. However, it makes sense for us to simply focus on the tasty species people target when shrimping locally. These species are illustrated and briefly described by the Alaska Department of Fish and Game in the SHRIMP IDENTIFICATION sheet above.
My focus in this blog post will be on Spot and Coonstripe shrimp. These are the two species we usually catch when shrimping with our shrimp pots.
We occasionally catch a few Humpy, Pink and Sidestripe shrimp in our shrimp pots as well. But, it sounds like these last three species are most often caught in quantity by people who use trawls.
HOW TO SHRIMP
Let's get equipped to go out there and catch some shrimp.
Shrimp may be caught with pots, ring nets and trawls. Because we personally have only used pots to catch shrimp, we will not be covering ring nets or trawls in this post.
NECESSARY EQUIPMENT: POTS, LINES, BUOYS, BAIT CONTAINERS AND BAIT.
POTS
There are all kinds of shrimp pots whether homemade or commercially made. ADF&G has some very specific pot requirements, so best to check these requirements in the most current Sport Fishing Regulations Summary before you build or purchase pots. Check out page 34 in the 2019 edition.


10 shrimp pots are allowed per person with a maximum of 20 pots per vessel.
When we started shrimping over 25 years ago, we used pots similar in design to the ever popular pots stacked below:
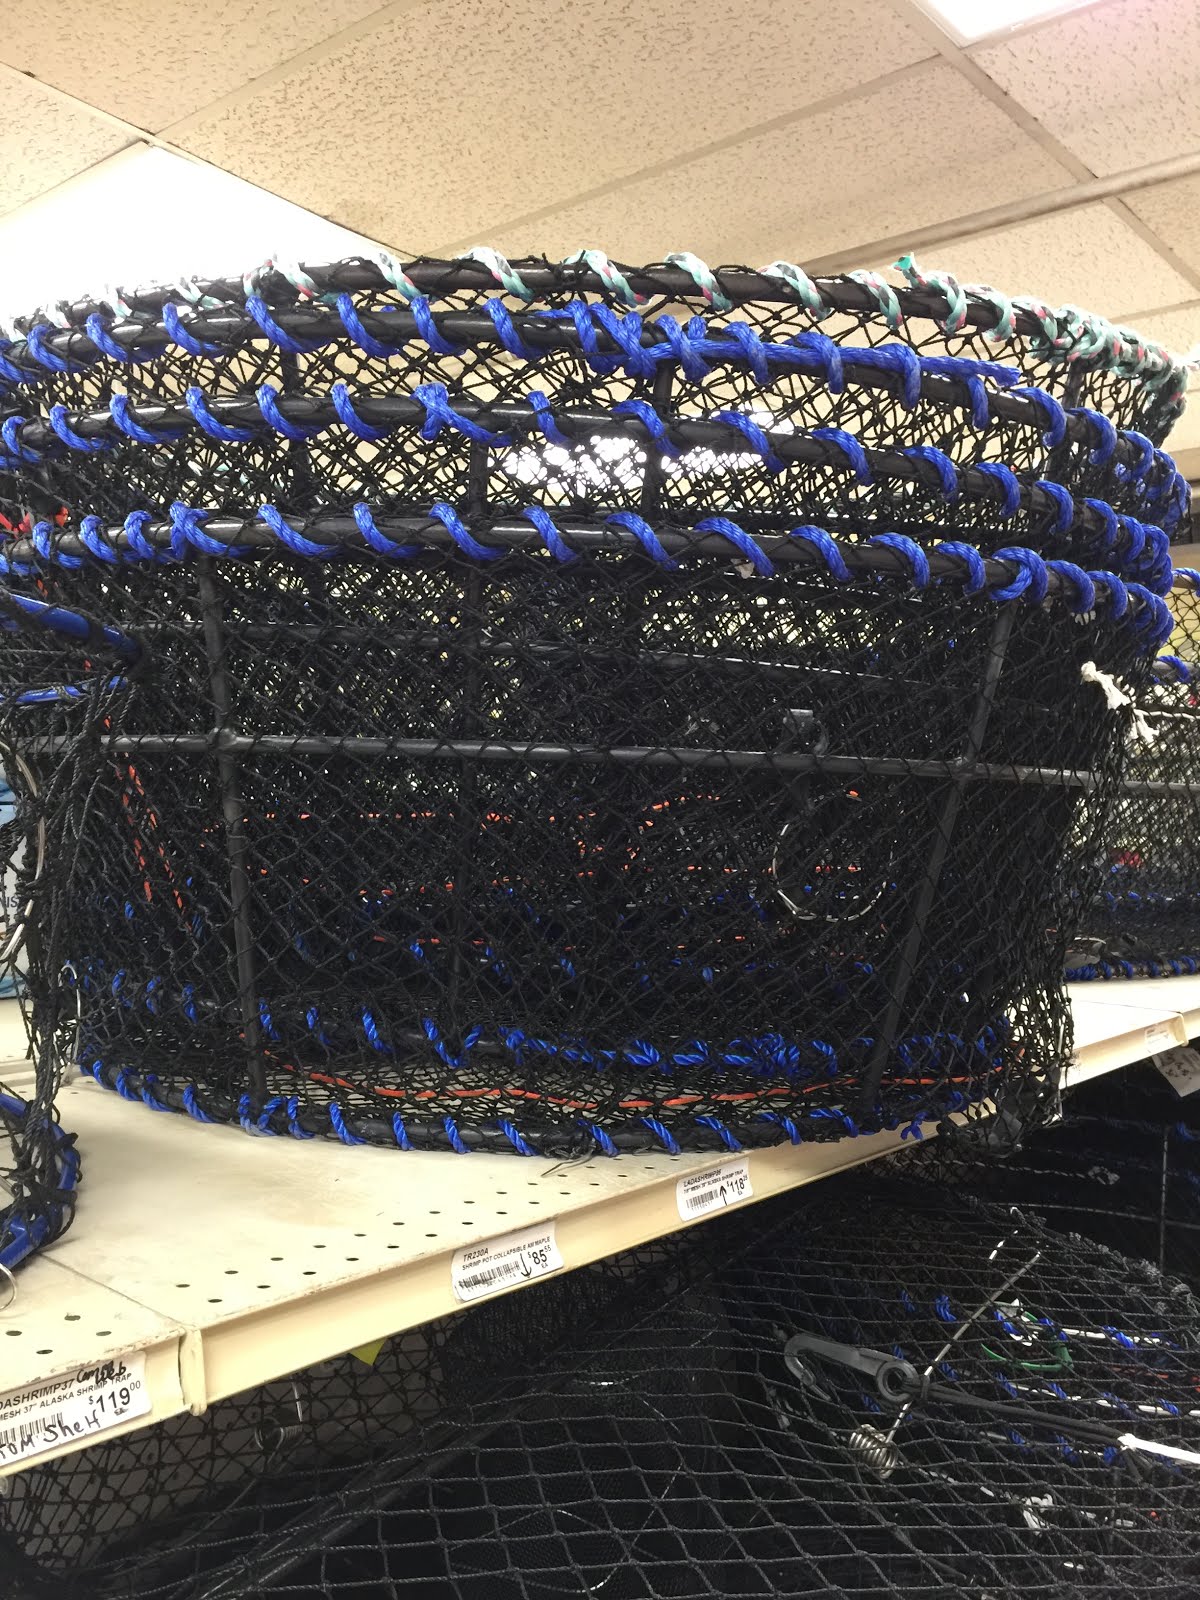
They are easy to stack and transport. We would longline these shrimp pots. This was done with one long rope. The rope needed to be long enough to reach the surface after spreading pots below surface along a target zone. We would attach a weight of some sort to one end. We then clipped several baited pots, at intervals, onto the line. We finished by attaching a large buoy at the other end to float on the surface.
The ocean floor in these parts is often rocky and jagged. Ocean currents can be powerful. Because of various issues, longlines with multiple pots occasionally get snagged, stuck or tangled. Damage or loss can occur. A number of years ago, we were given a newly designed shrimp pot to test from Dennis Franson, owner of SEA TRAPS. We were excited to give it a try. Even though it was only one pot dropped at the end of one line, it caught as many shrimp as a longline with 4 or more pots!

This pagoda style pot is fabricated from vinyl coated galvanized wire. The mesh size is 1 inch by 1 inch. This allows the small shrimp to escape.
Because this pot fished so well, we decided thereafter to keep 4 of these pots on our boat for catching shrimp in place of our longline pots. The top of the pot drops down into the bottom for storage.
LINES
We have tried shrimping and crabbing pretty much everywhere we have roamed when out boating. We keep four lengths of rope in a barrel. Each line is 400 feet long. Because we have caught shrimp in as little as 100 feet and as deep as 500 feet, we also have other lengths of rope aboard to accomodate our needs.
We have always had excellent marine supply stores in Sitka. Generally, they carry a wide variety of line. The employees are helpful when you need assistance making decisions. It is wise to use line that sinks when shrimping and crabbing for multiple reasons. The most logical reason is to prevent the line from floating near or on the surface of the ocean. You do not want to get a line caught up in your or anyone else's propeller.
The weather is not always calm in these parts. You just might find yourself and your boat blowing and bouncing around when trying to set or retrieve shrimp pots. A line that tangles easily can be upsetting.
Most people use either a hydraulic or electric pot puller to bring up pots from the deep. You will want line that works well in your pot puller. The width of the line can be as important as the length.
So, ask around and experiment.
Of all the lines that sink, we really like this line:

There is also line in bulk advertised specifically for crabbing and shrimping:

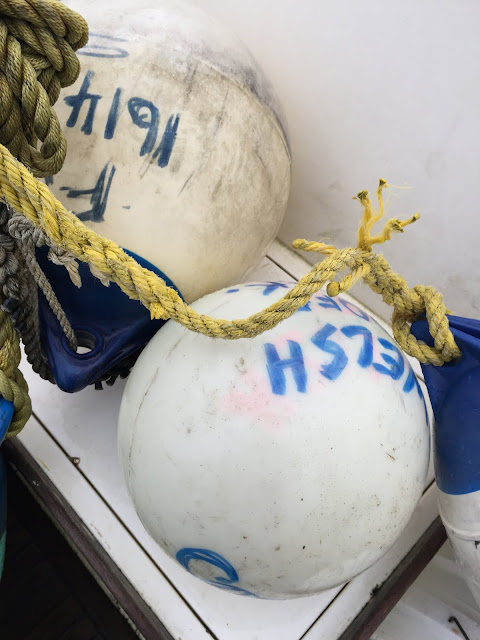
BUOYS
So many choices! Which shape? What color? Small, medium or large?

Whichever buoys you decide to use, it is required that you keep them marked clearly with:
- the first initial and last name of the person fishing
- the home address of the person fishing
- the Alaska DMV boat registration number (AK number) of the boat used to operate the pot or the boat name.

BAIT
We almost always have used fish waste (heads, guts, skins, tails and carcasses) for bait in our pots. We save and freeze all kinds of oily fish waste after we catch and clean our fish. It does not amount to very much bait in the big picture. Fortunately, when in need, we take advantage of the waste available in local canneries and fish processing plants.
It is the oily fish waste that seem to attract shrimp best for us... especially salmon and black cod. We pack this bait into buckets, surround the buckets with ice and enclose them in a cooler on the boat.

If we need bait when we are already out on the ocean, we get bait from the ocean. Here are the rules to follow:

Bait is also available for purchase. We have never tried any, but a friend tells me he appreciates the simplicity of buying bait bits that have an enticing oiliness and scent apparently irresistible to shrimp.
Another acquaintance uses canned cat food for shrimp bait. He says the shrimp favor the oily fish cat foods. He carefully pokes holes in the tins of cat food with a screw driver and hammer allowing it to trickle out slowly.
BAIT CONTAINERS
If we have a time limit and know we will only be making one quick set with our pots, we simply string up the fish waste and hang it inside our pots. No containers. But, if we want to preserve the bait for more than one set, or soak for more than a day, we use bait containers. If your bait is too exposed for any amount of time, it can disappear quickly. Even when the bait is contained, critters like sand fleas will eat all but the bones in no time at all!
It is pretty simple to make your own bait containers if you are so inclined. If not, you will likely find a wide variety of bait containers available for purchase. Bags, jars and boxes:

We have found this tubular orange mesh to be handy and simple for making our own bait bags among other things. We keep a long length stored on the boat. Varying lengths get cut according to the need.

Here are bait bags we made by tying a knot on one end and using a clip on the other end. On this trip, they were filled with black cod waste:

WHEN TO SHRIMP
Although fishing for shrimp is open the entire year, you may want to take a few issues into consideration.
Shrimp of various ages are carrying eggs and spawning a good part of the year. You have probably noticed a high percentage of the shrimp you catch carrying eggs as early as August until well into the next March. Eight months. Yikes!
You always have the option of immediately separating and tossing any egg carrying shrimp back into the ocean. Your choice. However, spring through mid-summer might be the best time of year to get out and fish for shrimp to avoid reproduction issues and to catch the highest quality critters.

WHERE TO SHRIMP
We caught shrimp in some of the unlikeliest places!
Whenever we are spending the night in a bay, it is fun using charts and a depth finder to scout out a steep spot...
steep because a nearly vertical mountainside continues on down below the surface of the ocean. Or, steep because an underwater rock pile, pinnacle, ravine or the like exists. Drop a pot where the angle is steep... not where the angle is slight nor on the flat bottom. Depth is not always relevant, although steep spots between 40 and 60 fathoms (240 to 360 feet) have been very good to us.
But, hey! One of our richest overnight soaks was on a steep slope at 125 feet. The flat bottom nearby was 150 feet! The rest of the bay was much shallower.
We've caught lots of shrimp in locations where the tides and currents raged... and in small, peaceful bays.
All in all, we have been mighty successful fishing for shrimp.
But, to be honest, we have also experienced mediocrity.
And, yes, sometimes the pot comes up without a single shrimp.
TRANSPORTING SHRIMP
No food seems to spoil faster than seafood. Especially shrimp. It smells bad and gets mushy way too soon! The easy solution is to keep shrimp COLD. If, on your boat, you have a supply of ice in a cooler, a spacious refrigerator or a freezer, it can make the difference between success and failure getting your fresh caught shrimp home.
When you catch shrimp and need to transport it home, start by emptying the shrimp from the pots into containers that drain.


If you prefer to keep your shrimp whole, you are ready to do some rinsing and draining.
We don't keep ours whole. We pluck off the "heads" and retain the "tails". It is quite simple after a little practice with a twisting motion. Once completed, we are ready to rinse and drain.

We use salt water for rinsing. Some people use fresh water.
We have found it wise to get the shrimp out of the pots, heads off, rinsed, drained and into a very cold place as soon as possible.
If you have decided to keep your shrimp cold by using ice and a cooler, the following method works well:
- layer ice on the bottom of the cooler
- now a single layer of shrimp
- another layer of ice
- another single layer of shrimp
- and so on
Tip up the cooler a little for the ride home so that water will drain out through the drain hole as the ice melts.
Some people just fill large ziplocks full of the rinsed, drained shrimp and surround it with ice in a chest. This can work. But, sometimes some of the shrimp in the interior of the ziplock don't stay cold enough... especially if they warmed up a little before going into the ziplock.
Don't have a refrigerator, freezer, or cooler on board? Put the shrimp in a bucket or tote with seawater. Add ice if you have it. Change the seawater periodically to keep it cold if it is going to take a while to get home.
PRESERVING SHRIMP
Ask around and you will find that most people who caught more shrimp than they could eat fresh, freeze it as soon as possible when they get it home. How they freeze it differs:
- Rinse in very cold water and drain the shrimp. Spread the shrimp in a single layer on cookie sheets or some kind of tray. Freeze for an hour or two. Once frozen, fill containers or ziplocks and store in the freezer.
- If you transported your shrimp home in ziplocks in a cooler, transfer them directly into your home freezer.
- Here is something a little different. We separated the shrimp by size into bowls: large, medium and small shrimp. We brought a bucket of cold seawater home (you can make your own brine with 2 tablespoons of salt for each quart of water). We filled empty milk cartons half full with seawater. We loaded the containers with the shrimp. Topped with more cold seawater. We closed and labelled the containers with the shrimp size and the date. Into the freezer it all went as soon as possible. As long as a year later, when we thawed the shrimp from the freezer, it looked and tasted the same as fresh!

EATING SHRIMP
Oh my! There are endless delicious recipes for shrimp!
For instance, this recipe book includes well over 100 recipes for shrimp!

Let's discuss some important basics about shrimp addressed in most seafood cookbooks, including the one above.
You can boil shrimp before shelling...
or shell shrimp before boiling.
Boiling shrimp before shelling is more inviting because I find it to be more time consuming to shell first. And, I find shrimp to be more flavorful when boiled in the shell.
So here is how to:
BOIL THE SHRIMP BEFORE SHELLING
- For every quart of water you are using, add 1/4 cup of salt.(For a gallon of fresh or frozen shrimp, I use a gallon of water and 1 cup of salt).
- Rinse the fresh or frozen shrimp.
- Bring the water and salt to a boil.
- Carefully dump the shrimp into the boiling water.
The shrimp will simmer. They are done when the color changes to pink and the shrimp float up to the surface. This should take no more than five minutes, depending on the size of the shrimp.
If you have shrimp that are different in size, drop the large shrimp in first. A minute later, drop in the medium sized shrimp. Last of all, drop in any small shrimp.
Drain the shrimp into a colander in the sink.
Quickly transfer them into a waiting container of cold water for a few minutes to end the cooking.
If you leave the shrimp in the cooking water too long or fail to transfer the shrimp into cold water, they will likely be mushy.
Some recipes call for shrimp to be shelled before cooking.
A favorite in many households, including ours, is
DEEP FRIED COCONUT SHRIMP
You will need:
- shrimp
- flour
- beaten egg(s)
- unsweetened or sweetened shredded coconut
- dried bread crumbs or panko
- vegetable oil
- Peel the shrimp... preferably large in size.
- Rinse the peeled shrimp.
- Pat the shrimp dry with a clean cloth or paper towel.
- Coat the shrimp with flour. This is easily done by placing the shrimp in a bowl and stirring... or in a bag and shaking.
- Dredge the flour covered shrimp individually in the beaten egg(s).
- Stir together equal amounts of coconut and breadcrumbs in a bowl. Press each egg covered shrimp into this mix until well covered.
Heat vegetable oil to 375 degrees in a deep fryer. I prefer avocado or canola oil. If you are not using a deep fryer, heat about 2 inches of oil to 375 (medium high) in a medium sized pot on your stove top.
- Drop several of the coated shrimp into the pot or deep fryer at a time.
- Cook until golden brown. About 4 minutes.
- Remove from oil.
- Drain on a clean cloth or paper towel.

ENJOY!
Where can I purchase the Pagoda style pots? How much for 1
ReplyDelete