Saturday, February 28, 2015

TOMATOES

TOMATOES are reluctant to ripen in Sitka without some help. It's just not warm enough most summers even for the very early varieties. After years of experimenting, the greenhouse wins out. There should be a sign over our greenhouse door, "Give me your cold and weary."


There are quite a few early tomato varieties that do well in a protected environment. We have enjoyed many varieties including GLACIER, SILETZ, STUPICE, NORTHERN DELIGHT, SUB-ARCTIC, BEAVER LODGE, OREGON SPRING, LEGEND, SUNGOLD, YELLOW PERFECTION  and EARLY GIRL.


Here are my three favorites. They are delicious and have produced well consistently:
LEGEND


SUNGOLD   (children love these)


YELLOW PERFECTION


It is probably best to start tomato seeds as early as February... but no later than the end of March. This will afford the plants plenty of time to grow and produce well even if we are having a wet, cool season. 


Luckily, lots of old commercial baking pans and sheet pans came my way years ago. They have been a great asset with my seed starting. Fill a tray with 4" pots and fill the 4" pots loosely with seed starting or potting soil.


In each of the 4" pots use your finger and make two or more depressions about 1/2 inch deep.


Drop a seed into each of the depressions. Now sprinkle enough sand on the surface of each 4" pot to cover the entire surface... about 1/2" of sand. If you don't have sand, use potting soil. Label each 4" pot if you are growing more than one kind of plant or more than one variety. The pots always get mixed up if you don't label them. Trust me. (The seed packets you see below are there just temporarily for show). 


Gently water the surface of each 4" pot with warm water until well moistened. Fill the base of the tray with about 1/2" of warm water as well. Cover over the entire tray loosely with a plastic bag ripped open. Air needs to circulate under it or you will see it get moldy in there. Recycled plastic bags from the grocery store work well. Place the tray on the hearth behind your wood stove (if you have one), use an electric seed warming mat or set it near your furnace or home heater. Take advantage of whatever warm spot you have in your home.


In general, seeds germinate in a matter of days. Some take weeks. Most tomato seeds take one or two weeks. Be patient and keep them plenty moist (not real wet) and warm. 


Ten days later and... voila! There are two or more lovely little tomato plants growing in each of the 4" pots:


Twenty five more days have passed. The tomato plants have outgrown their 4" pots. Time to do some transplanting.

         
Water the plants. Carefully shake out the contents of each 4" pot. Gently separate the tomato plants taking care not to damage the plants or roots. At this stage, the tomato plants often look a little leggy... thin and tall. 

Each individual plant now needs a new home in a gallon-sized container. If you don't have any, get creative. Try using something like gallon-sized plastic milk cartons from the recycle center, cut off the tops and poke holes in the bottom.

Put a little soil in the bottom of your container. Now set the tomato plant deep in the bottom center of the container. Holding the plant steady with one hand, fill the soil around the stem all the way to the top of the container. Burying the stem up past the lower leaves is fine. Roots will grow all the way up the buried stem. Tamp the soil down a little. Label.  When you have given each tomato plant a new home, water gently and thoroughly. Set all of the plants in a tray and place the tray in your sunniest location indoors. Water regularly to moisten, but do not overwater.


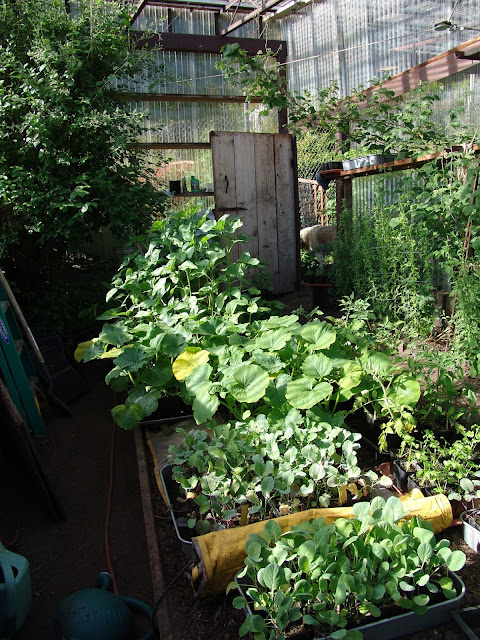
After three or four weeks in the larger pots, the tomato plants are ready to go out into a greenhouse or cold frame type environment. Our tomato plants, still in their gallon sized pots, were moved into our greenhouse with lots of company. There they are in the center to the right of the zucchini plants.


After a week or two of getting accustomed to the cooler nights, the tomato plants are removed from their gallon pots and planted into large containers in the greenhouse


or removed from gallon pots and planted directly into the soil floor of our greenhouse.


Because I often start quite a few tomato plants, there are usually enough for me to also place a few in our sunniest window inside our home. These also have been taken out of the gallon pots and transplanted into much larger containers.


Tomato plants need to be watered and fertilized regularly throughout the season... taking care not to overwater. It is surprising how many tomatoes each plant produces! We often have more tomatoes ripe at the same time than we can eat. Simply keep a ziplock in your freezer and pop any extra ripe tomatoes inside. You will likely end up with a large collection of whole, frozen tomatoes that can later be cooked into sauces, soups, chili, salsa and more!

At the end of the tomato season, usually the end of September for us, pick all of the green tomatoes off of your plants, place them on a tray and put the tray in a dark pantry or cabinet inside your house. Don't forget about them! Check them regularly. It won't be long before the tomatoes are ripe and brightly colored!




Wednesday, February 25, 2015

SEED OBSESSION

I admit it. I am obsessed with seeds. It's been going on for most of my life. I love to gather seeds, sort seeds, trade seeds, eat seeds, share seeds, buy seeds, photograph seeds, decorate with seeds, save seeds and yes... grow seeds.
A small sample of my seed stash


Apparently, the seed catalog people are well aware of my obsession.


Ordinarily, catalogs are not a welcome sight in our mailbox. Seed catalogs are the exception. For me, they are awesome and inspiring. By February of each year, I have a pretty good idea of what I want to grow in our gardens: new plants, new varieties and the old stand-bys. I haul out my two air tight plastic tubs from their cool, dark storage place. Careful storage can extend the life of many seeds. One tub is filled with vegetable seeds, the other with flower seeds all filed alphabetically in folders. Well, pretty much.


After checking my stash of seeds to see what needs replacing, I order and purchase seed packets from catalogs and local merchants. Sitka has conscientious merchants!    
NON-GMO, OPEN-POLLINATED and ORGANIC:


If you like to save your own seeds from your plants for future use, it is important to understand the source of seeds. The seeds you purchase are:

OPEN-POLLINATED SEEDS - You will see the words OPEN - POLLINATED on the seed package. These seeds are true seeds in the sense that pollination occurred naturally by birds, the wind, insects and the like. The seeds saved from plants started from open-pollinated seeds you purchase will continue on growing the same plants as the original. These seeds will be inclined to adapt to local conditions and climate. 
So, yes! If you like to gather, save and grow your own seeds, then purchase and use open-pollinated seeds.


HEIRLOOM SEEDS - You will see the word HEIRLOOM on the seed package. Heirloom seeds are similar to open-pollinated seeds but have been passed down and protected over generations by individuals, families, communities and the like. 
So, yes! If you like to gather, save and grow your own seeds, then purchase and use heirloom seeds.


HYBRIDIZED SEEDS - People can strengthen or create a preferred trait in a plant by crossing two different plant varieties. You will know this has happened because you will see the word HYBRID and/or F1 after the variety name on the packet. Plants grown from seeds you have saved from your hybridized plants will not be true to the original plant you grew. 
So, no! If you want to gather, save and grow your own seeds, do not use hybridized seeds for this purpose.


Here is one of the big questions, "WHEN SHOULD I START THE MANY DIFFERENT KINDS OF SEEDS I WANT TO GROW?"  After all these years of gardening in Sitka, this is a 'Frequently Asked Question' even by me. Our climate is pretty much incomparable. Sitka is part of a maritime northwest temperate rainforest. Our growing season and weather conditions are inconsistent from year to year... with more rain than most people can imagine! Another important consideration, of course, is how much time your schedule allows.  So, I put together a SEED STARTING TIMELINE to be utilized with great flexibility. Seeds can and should be started sooner or later than the suggested times depending on the conditions presented in any given year. 

Now that I am getting old and forgetful, the SEED STARTING TIMELINE also serves me well as a checklist.


I find it handy each year to list any flowers I plan to start in the left margin of the timeline. I print myself a fresh copy of the timeline each year. 


As winter fades, gardeners (including me) are often anxious to get things going... especially to get seeds growing! However, I encourage you to focus primarily on getting your garden plan established...what you intend to plant and the location you think will be best. Healthy, fertile soil is important in your garden beds with good drainage. 

Keep in mind that starting seeds too early can, and often does, result in leggy, unhappy starts. It is a challenging mistake if your plants are ready for a greenhouse or cold frame for hardening off before there is enough warmth for them to survive in those locations. We need to take our time and think things out. I remember well having too many plants for the space available inside my home when it was too cold for them to go out. 

My experiences lead me to believe that it is far less stressful and more successful to start seeds a little late than a little early. The fall weather has consistently been kinder and more considerate of our gardens than spring weather.

A few ideas for those of us who have moved lots of plant starts out to cold frames or a greenhouse too soon and already filled their places indoors with more starts:
 
- It helps to keep a floating row cover handy in the greenhouse. If the temperature drops uncomfortably low, cover the starts with a floating row cover or two. 

- Set your cold sensitive starts on top of heat mats and plug in the mats when necessary. (We wired our greenhouse with electricity especially for this scenario). Add a floating row cover on top of the plants. 

Many years ago, I stopped at a garage sale and was fortunate enough to find and purchase a few heavy duty 4 foot x 12 foot heat mats used for drying cement. Sooo useful! These mats face down when they are drying cement, but face up for warming plants.


Each spring, as our plant starts are ready for hardening off, they are brought uphill to our greenhouse and set in trays on top of those mats on the dirt floor of the greenhouse. If we get troublesome cold weather, the mats are plugged in and turned on at night to keep the plant roots and soil slightly warm. In addition, the plant greens are kept cozy and protected under a floating row cover.


As spring progresses and the chance of frost or freezing weather passes, the heat mats are put away and the plants are gradually moved out to grow in the awaiting fertile outdoor beds. Most plants will live the entire summer and fall under floating row covers. To keep the floating row covers in place, we often use old lengths of rebar.


The floating row covers are removed periodically for such things as slug removal, weeding and harvesting.


Otherwise, the covers stay in place allowing sun and rain to pass through. No need to remove when watering with a hose.


Our plants requiring a warmer or dryer environment than they would likely experience out in the open are transplanted into the fertile soil floors of our greenhouse:


or our open-sided covered garden:


Sending you sincere best wishes for success starting your seeds and growing your gardens!


Sunday, February 15, 2015

INTRODUCTION and INDEX


INDEX 

THE TOPICS (LABELS) FOR THIS BLOG ARE IN ALPHABETICAL ORDER 

To read about a topic, 
simply click on the topic from the list over to the right >


THIS BLOG IS A WORK IN PROGRESS. 
MORE TOPICS WILL BE ADDED.


TO ENLARGE A PHOTO, SIMPLY CLICK ON IT.


INTRODUCTION
Our family has gardened on our property here in Sitka, Alaska since 1984. Sitka is located on the western shore of Baranof Island in a temperate rainforest. The forest is rooted in volcanic ash atop uneven, rocky terrain. Countless hours of soggy labor went into landscaping and developing our garden beds. Finding and growing suitable flower, fruit and vegetable varieties involved lots of trial and error. So far, the outcome of our efforts has been more than favorable. No one has been more surprised and delighted with our success than we are!


We are essentially organic gardeners. Our plants are produced with fertilizers of plant or animal origin as opposed to chemically formulated fertilizers and pesticides.


Many of the flowers, herbs and vegetables we grow need to be started indoors from seed in February, March and April. We use our own seeds as well as purchased seeds. 

We use our own soil for the starts as well as locally purchased seed starting soil.


We designed our woodstove hearth to hold lots of plant trays. The woodstove warmth promotes seed germination. 


We also use electric heat mats to germinate seeds:


For four to six weeks after germination, the young plants get the best natural light we can offer inside our home before they go out to our greenhouse. I think it was in 1988 that we built this south facing window especially for young, tender plants.


Plants are gradually moved out of our home and into our greenhouse for hardening off. 


Hardening off acclimates the plants to our cool days and nights. The move to the greenhouse depends on plant sensitivity, size and weather. 
                                                                                                   photo by Hope Merritt


By the end of May, most plants have been moved out of the greenhouse to the outdoor garden beds.


We have grown the bulk of our vegetables in several large garden plots each year. Crops are rotated annually in these plots.


Fruit trees, flowers and berries are grown in and around the vegetable plots as well as in separate locations including this covered garden:


Our garden soil is rich and healthy. We started each of our many plots the same way. After removing as many of the tenacious salmonberry bushes and weeds as possible, we are left with soil comprised of a little organic matter and lots of volcanic ash. So we brought in equal amounts, as much as we could get, of sand and seaweed. We have never pulled attached seaweed off of rocks. We collect the loose stuff piled up at the high tide line at the top of beaches... preferably after the annual spring herring spawn. It usually included a good spattering of herring eggs.


Nature provides sand in a wide variety of locations. Our main source has been pockets of sand on our own and friends' properties where rivers once ran. If you need a significant quantity, we have commercial sand and gravel businesses right here in Sitka with very fair prices. 

We try to add more loose seaweed each spring to our established garden plots. We mulch our perennials with leaves and seaweed in the fall. When any of the plots need sweetening (need a higher pH), we like to till in fine, broken shell found washed up high on some beaches.

Lime is also available commercially.


After adding spring nutrients and supplements, we rototil our vegetable plots thoroughly. 


Next, we shovel the soil into raised rows or beds. We have periodically underlined raised beds with composted fish scraps and other waste of our own... as well as from local fish processing plants. No boards or other supports are necessary.


After the starts are transplanted into the rows, each row is covered loosely with a floating row cover. This is a lightweight material that keeps out insects and pests while allowing rain and sunlight to pass through. It also causes the soil temperature to increase significantly.


In earlier years, we removed many of the floating row covers permanently by the end of July. Unfortunately, this exposed our crops to late summer pests such as hungry caterpillars and destructive aphids. This forced us to keep our floating row covers in place throughout the entire season. 


When we removed the floating row covers temporarily for weeding and harvesting, healthy plants were revealed and have been truly a joy to behold!


It seems that there are as many methods of gardening as there are gardeners!
Each gardener gathers information and acquires preferences over time.
It all comes together in a unique way. In this blog, SITKAVORES, I will be sharing the Welsh family's approach to gardening... 


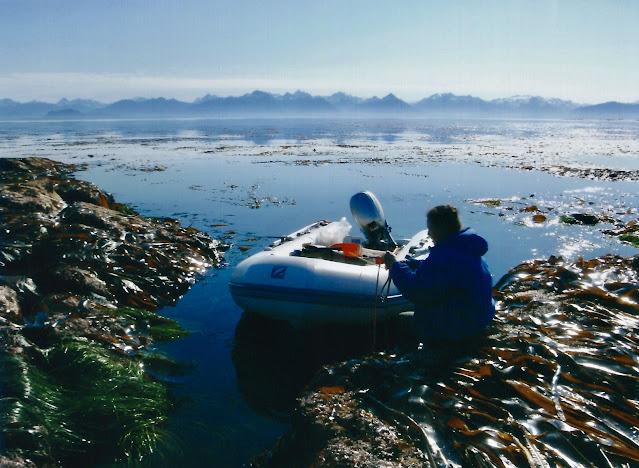
and our experiences gathering food in the wild in and around Sitka. We used a Boston Whaler to get around on the ocean in our early years of wild harvesting. Eventually, we acquired a larger boat enabling us to spend as many days as we wished in any of the countless bays in the Sitka area.


Once anchored in a bay, it is a small skiff that zips us around gathering delicious wild foods from both land and sea.
                                                               photo by Hope Merritt


May all of your gardening and wild harvesting endeavors 
be successful and fulfilling!
                                                                                                                                        photo by Cory Welsh


All SITKAVORES photos are by Florence Welsh unless otherwise noted.

You are welcome to contact Florence Welsh by email: sitkavore@gmail.com