Friday, February 26, 2016

PEAS

Much like my experience with beans... the bland, canned peas of my early years have yielded to fresh, flavorful green gems grown in our fertile gardens. 

Peas grow well in cool weather.    

So, yes, peas grow well here in Sitka. 


There is more than one type of pea. Let's look at the most common three:


SHELLING PEAS 

The most familiar type is the shelling pea. Open the mature pod and remove the peas. Eat the peas, not the pod. This variety of pea is often enjoyed fresh off the plant as a snack and added to salads. Shelled peas are added to a vast array of cooked meals. If they are not all gobbled up soon after harvest, shelled peas are easily canned, frozen or pickled.

Some of the shelling peas we have grown and enjoyed are: 


  • ALDERMAN (TELEPHONE POLE) - With the best of all flavors, these plants are 8 feet tall and need support.
  • CANOE - 2 1/2 feet tall. Semi-leafless means good air circulation. The curved pods are loaded with more peas than most varieties. 
  • GREEN ARROW - 2 feet tall. Pods are paired like twins! 
  • MAESTRO - 2 feet tall. The pods reach out from the plant when mature.
  • SERGE - 2 1/2 feet tall. Semi-leafless and self supporting!


SNAP PEAS
Highly productive, snap pea plants grow lots of edible pods. Yes. Pick and eat the entire thing! When the peas inside the pod plump up and mature, so does the pod! Snap peas are deliciously sweet when picked and eaten fresh off the plant or when lightly cooked. I especially love snap peas pickled with garlic and dill.

Some of the snap peas we have grown and enjoyed are:

  • CASCADIA - 2 to 3 feet tall. Unusually sweet.
  • SUGAR ANN - Dwarf, sweet and self supporting.
  • SUGAR DADDY - 2 feet tall and self-supporting.
  • SUGAR LACE - Dwarf, semi-leafless and self supporting.
  • SUPER SUGAR SNAP - 5 feet tall. Unusually productive.


SNOW PEAS
As with snap peas, eat the sweet and tender pod and all! Unlike snap peas, the peas stay small inside the pod at maturity and the pods are flat. Snow peas are easy to grow and highly productive. Snow peas are eaten most often in salads and stir fries.

Some of the snow peas we have grown and enjoyed are:

  • MAMMOTH MELTING SUGAR - 4 to 5 feet tall.
  • OREGON GIANT - 2 1/2 feet tall. The pod is giant!
  • OREGON SUGAR POD II - 2 to 3 feet tall. Highly productive.


GROWING PEAS

Growing peas is simple and fun. 

Sometime in spring (we like mid-April) prepare an outdoor garden area for your peas. Some people start peas as early as March and others as late as July. Depending on the variety, maturity will be 60 to 90 days after your pea seeds sprout.


Peas like good drainage, composted organic matter, neutral soil (around a pH of 7) and one of your sunniest locations.

We had to do lots of terracing over the years in our steep yard in order to create garden beds. Consequently, we have lots of fencing. When choosing a location, keep in mind that most pea plants need to be supported or tied up to fences, trellises etc. Some pea varieties are self-supporting. Here is an example:


Self-supporting pea plants grow lots of tendrils. The tendrils attach the pea plants to each other and fences with no help from people!


Once your ground is prepared, choose your peas. It gives the peas you are planting a boost if you soak the peas a few hours, or overnight, in water that is room temperature:


After the peas have soaked, drain off the water. They are ready to plant. 


I removed the fencing temporarily from the area where I intend to plant the peas. This is not necessary, but it made the process more convenient and accessible for me. I am planting the peas so plants will grow on both sides of the fence. 

I dug two shallow ditches, about 1 1/2 inches deep on either side of the fence line. 

I sprinkled the peas, not all that carefully, into the two ditches. I will spread and space them when I cover the seeds with soil.


On hands and knees, I spaced the pea seeds about 1 inch apart and covered them with the surrounding soil. They like to be planted down about 1 inch under the soil.

Once covered with soil, I patted the soil down firmly over the pea seeds. Apparently, they like a little pressure for optimal germination and growth. Sprouts usually appear about 1 to 2 weeks later:


Gently water your peas regularly. They like to be kept moist, but not soaking wet. You don't really need to cover the peas with a floating row cover, but I usually do. This is not so much to keep them warm, but rather to keep out ravens, crows and other birds. If a bird spots an exposed pea seed or two, it can lead to a digging and feeding frenzy!!!


Plant growth is vigorous when conditions are right:


By mid-summer you will be snacking on peas!


We almost never have enough peas to freeze or pickle. It doesn't matter how many we grow. They are so delicious when fresh picked that they disappear in no time at all. 

Last summer we had a bumper crop. It was probably because it was an unusually warm summer. I pickled a case of peas before anyone but me got their hands on the last of the peas. They sure are tasty in winter!


HAPPY GARDENING!!!


Monday, February 22, 2016

BEANS

Canned green beans were common fare in my early years. Most everyone thought they tasted pretty good. Canned green beans frequently graced the table at home, in schools, in restaurants and at holiday gatherings. 

What about the taste of beans straight from the garden? Well, once we ate fresh homegrown beans, there was no looking back. Incomparably delicious! And nutritious!


In general, beans are a warm weather crop. The seeds sprout in soil 60 degrees and above. The plants are happiest in those temperatures, too. So it comes as no surprise that bean plants do not show much enthusiasm outdoors in our mostly cool, damp environment.  Although we have had some success with a few varieties pampered outdoors under floating row covers, it is in the warmth of our greenhouse that beans have truly flourished. 


POLE BEANS

Initially, like thirty years ago, I chose to grow POLE beans in our greenhouse on trellises. We grew several varieties including: 


  • BLUE LAKE
  • KENTUCKY WONDER
  • LIANA 
  • RED NOODLE 

Unfortunately, they attracted aphids beyond belief! 

After a few years of battling aphids, I quit growing beans. 

Although I had tons of energy for gardening, I did not have much experience or insight all those decades ago. Now I have insight and experience, but not nearly as much energy!


I am thinking now that my aphid problem had little to do with the bean type, which was what I presumed back then. The problem was probably a consequence of the environment in which the beans were grown. I have not had an aphid problem with any kind of bean plant once I heeded the following:


  • Beans like to be kept warm.
  • Beans like a slightly acidic soil. With our acidic volcanic soil, we are pretty much okay in this area.
  • Beans are not heavy feeders, so go easy on the fertilizer.
  • Beans are not happy with lots of nitrogen. So, go easy if adding any manure or herring eggs. Too much nitrogen results in lots of greens and very few beans.
  • Beans tend to grow shallow roots. Consequently, the roots go dry rather quickly. They need to be kept moist. So, water frequently. Mulching the soil around the base of the bean plant does wonders for retaining the moisture in the soil below. 
  • Bean plants do not like their leaves to be wet, especially as they fill out and have less air circulation. Water the base of the plant, not the leaves.


BUSH BEANS

When I learned about the existence of bush beans, I gave beans another try. Bush beans are considered the most trouble free of all bean types.


There are many bush bean varieties. Here are a couple of varieties we enjoyed in the past:


Last year's bush bean varieties:


These three bush bean varieties will hopefully be growing in our greenhouse this year:


FAVA BEANS


When you read the information on FAVA bean seed packets, it might be confusing. Unlike the heat loving pole and bush beans described above, fava beans are described as growing well in cool, coastal climates... similar to peas. As it turns out, fava beans are, in fact, ancient members of the pea family! This is good news! 


Here are some healthy FAVA bean starts grown from seed:


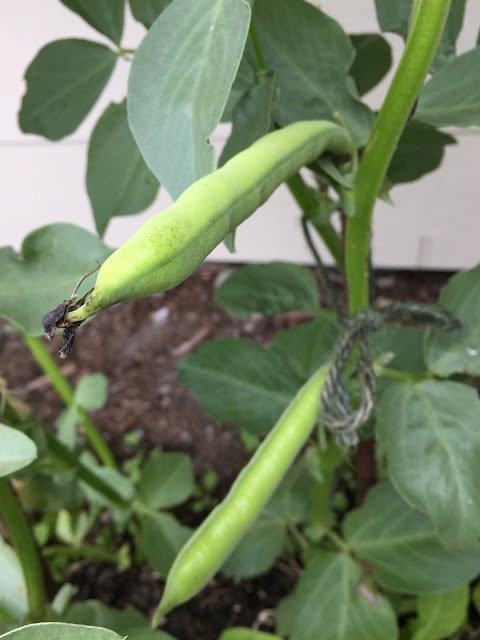
The pretty flowers on the FAVA bean plants crowd together:


The bad news, and what discourages many people from growing FAVA beans, is the amount of work it takes to prepare them for most recipes. Here is the scoop:


HOW TO PEEL FAVA BEANS


  • Bring a quart of water with 1 teaspoon of salt to a boil in a pot.
  • While the water is heating, remove all of the beans from the pods.
  • When all of the beans have been removed, drop the beans into the boiling water for two minutes. (This is called blanching).
  • After two minutes, scoop the beans out of the boiling water and drop them into a bowl of very cold water to cool them quickly.
  • Drain the cooled beans.
  • Remove the outer skin of each bean by splitting the bean skin open and squeezing out the bean.


Once the FAVA beans are skinned, they are delicious: 


  • added to salads
  • on top of toasted, crusty bread with cheese melted on top
  • added to seafood fettuccine
  • as a side dish: mix fava beans with steamed asparagus and top with toasted ground almonds and a lemony dressing or sauce.

Fava beans really are delicious. You might decide they are worth all of the work once you have enjoyed their buttery, nutty flavor. 


I am aware of a quick and easy way to prepare FAVA beans. GRILLING!!! Grill the unopened FAVA bean pods slowly, turning the pods frequently for 10 minutes or so until they look a little charred. Remove the pods from the grill and cool them a little. If you grill the FAVA bean pods when they are young and tender, you can enjoy eating the pod and all. If you have more mature pods, pop them open and enjoy the steamed beans from inside with a little lemon and your favorite dipping sauce.


Fava beans have done well in our gardens... both outside under a floating row cover and inside our greenhouse.


STARTING BEAN SEEDS


Why do I start bean seeds at the end of April??? It is a matter of space.


In April and May there are a large number of plant starts crowded together in our greenhouse. They are in the greenhouse hardening off and waiting for warmer weather to be planted outdoors. I start the bush bean seeds inside my house at the end of April. After the beans sprout, they grow quickly to a good size by the end of May. This coincides with when I move most of the other vegetable starts out of the greenhouse for transplanting into the outdoor beds. Once the cool weather plants are moved outdoors, there is plenty of space in the greenhouse. The bean starts, along with other heat loving plants,  are transplanted into very large pots or directly into the warm soil floor of our greenhouse.


 Let's look at starting bean seeds:


  • Fill 4" pots with potting soil or seed starting mix.
  • Place the soil filled pots on a tray of some sort.
  • Poke anywhere from three to five holes in the soil of each pot. The hole should be about 1 inch deep.
  • Drop a bean seed in each hole.
  • Cover the beans with some fine sand or soil. Press the soil firmly over the seeds.
  • Gently water all of the pots until well moistened.
  • Place the tray in your warmest, sunniest window. 
  • You can use a seed warming mat, but it is not necessary.
  • Cover the tray of pots loosely with clear plastic.
  • Remove the plastic cover regularly to gently water.
  • Most beans will sprout in about 10 days.


Here are some bean starts at the end of May ready to be planted in the greenhouse:


In no time at all they were happily growing inside the warm greenhouse in large black pots. The pots used were 15" tall with a diameter of 18 to 20".  Three or four of the healthiest plants were transplanted into each of the pots:


The first of the bush beans were ready for picking in July. 

It seems the more you pick, the more they grow!

ROYAL BURGUNDY:


FRENCH GOURMET GREEN BABY FILET TYPE:


The DOW GAUK plants did not produce well. After reading the fine print, it turns out that they are not actually beans. Like FAVA  beans, DOW GAUK beans are actually peas. And, DOW GAUK grows like a pole bean, not a bush bean! I might try growing them again anyhow. I will be more conscious of the soil preparation, watering and other issues. Something bean-like that tastes similar to asparagus just might be worth the effort!


COOKING BUSH AND POLE BEANS


Our quick and easy favorite recipe for both bush and pole beans is to simply steam the beans about 5 to 8 minutes, until just tender, and sprinkle on our favorite seasonings or some crumbled smoked salmon. 


A little fancier and more flavorful approach starts the same: 


  • Steam the beans for about 5 minutes. 
  • While the beans are steaming, cook two or three bacon strips in a medium sized fry pan. 
  • Remove the cooked bacon and drain on a paper towel. Remove all but a tablespoon of the bacon fat from the fry pan. 
  • Once the beans have steamed, remove from the pot and drain.
  • Saute the drained beans briefly over medium-high heat, two or three minutes, in the fry pan containing the tablespoon of bacon fat. Stir constantly and then remove from heat.
  • Crumble the cooked bacon strips and sprinkle over the beans before serving. 


We sometimes harvest enough pole and bush beans to do some pickling. 


The pickling process takes a little time, but is pretty simple:

  • Cut the beans 3 to 3 1/2 " to fit a pint-sized canning jar.
  • Steam the beans until just tender... 3 to 5 minutes. 
  • Remove the beans from the steamer and dump them into very cold water for about 5 minutes.
  • Drain the cold beans.
  • Decide how many pint-sized canning jars you will be using and sterilize them in boiling water.
  • Place 1 clove of garlic, whole or chopped, into the bottom of each pint sized canning jar. 
  • Add fresh or dried dill weed to each jar. I like to use a lot of dill, so I grow my own.
  • Fill each jar with the cut beans.
  • Make a 50/50 mix of apple cider vinegar and water. You will need about 1 cup of liquid for each pint jar. Bring this liquid to a boil in a sauce pan. 
  • Cover the beans in each jar with the boiling mix. There should be a space at the top of the jar of about 1 inch.
  • Place sterilized lids on the top of each jar and screw on sterilized rings.
  • Submerge the filled and covered jars in a boiling water bath for 10 minutes.


HAPPY GARDENING!!!


Sunday, February 7, 2016

SPINACH


I can't believe I love spinach! 

Spinach was one of those vegetables I could barely choke down when young. 

I undoubtedly practiced the best of my disappearing vegetable tricks whenever spinach, all mushy and wet, showed up on my plate.

Yes, now I love to eat spinach and I love to grow spinach. 

Fresh, homegrown spinach and a good recipe make all the difference!


We have grown and enjoyed many spinach varieties. Let's have a look at a few we found to be outstanding: 


EVERLASTING SPINACH

Maybe this spinach got the name EVERLASTING for more than one reason. 

First of all, it did not bolt in our garden throughout the entire season!  When a plant bolts, it produces flowers and seeds. The leaf production diminishes as the energy goes to the flowers and seeds. Many varieties of spinach tend to bolt when the summer days warm up and lengthen.

In fertile soil, the beautiful, savoyed (crinkled) leaves of a vigorous EVERLASTING spinach plant will grow large and healthy throughout the summer and into fall. 

Another reason for the name EVERLASTING is because this spinach is, in fact, a biennial plant! This explains the failure to bolt the first year. A biennial plant ordinarily grows leaves the entire first season. The second year, the biennial plant grows flowers and seeds before it dies off. So, if you allow it, you will likely see your EVERLASTING spinach plants revive the second year to produce flowers and seeds.


A third reason for the name EVERLASTING, at least from my viewpoint, is because this variety of spinach will always have a place in our gardens. 


MONNOPA SPINACH


Spinach, in general, is known to contain oxalic acid. The bitter taste of spinach is, at least in part, a consequence of oxalic acid. Also, it sounds like this oxalic acid can interfere with the absorption of calcium and possibly other beneficial minerals in our diets. So, it is good to know there is a sweet tasting spinach found to be low in oxalic acid. MONNOPA!

MONNOPA spinach is unusually tasty. We have been eating it off and on for nearly 30 years. 


As with many spinach varieties, MONNOPA is an annual and tends to bolt by mid-summer if started in spring. I let the plants bolt and harvest the seeds by summer's end. No need to purchase seeds the next year if you harvest and save your own!


We have enjoyed MONNOPA leaves in the fall months by starting more seeds and planting another small bed in June or July.


NEW ZEALAND SPINACH

Tetragonia tetragonoides
Do a little research and you will learn that NEW ZEALAND spinach is not a true spinach. It was called "spinach" because it looks and tastes a lot like spinach. 

NEW ZEALAND spinach is a perennial in some parts of the world, but has acted like an annual in our gardens. It dies off by winter, never to return. 

NEW ZEALAND spinach is not early to bolt. Luscious stems and leaves are plentiful for harvest all through the summer and into fall. The plants continuously grow and spread covered with deep green, succulent looking leaves of various sizes. The upper stems are tender and easily picked with attached leaves for good eating. Gradually, by early fall, small yellow flowers begin to form. The plant tends to die off here in Sitka before seeds mature. 

NEW ZEALAND spinach is high in oxalic acid. It might reduce the oxalic acid a tiny bit by dropping the leaves and tender stems into boiling water (called blanching) for 2 or 3 minutes. Next, cool the greens in a container of cold water. Finally, drain. 

Enjoy blanched NEW ZEALAND spinach mixed in with sautéed onions or leeks. These greens are delicious in an omelet or quiche! Maybe add to a stir fry. Enjoy the greens chopped into a salad. 


It is simple to vacuum and freeze your blanched NEW ZEALAND spinach after draining it well. 

After blanching and draining, we have also dehydrated these greens and blended them into a powder. The powder is a quick and easy addition to such things as soups, smoothies, green drinks... and so much more.


STARTING SPINACH
Let's use NEW ZEALAND spinach for the example here.

In the past I liked to start my spinach seeds around mid-April. But, nowadays, it makes more sense to start them in early April. You will likely be successful starting them even earlier. Spinach plants do not seem to mind being cool once the seeds have sprouted.

So, let's get those seeds sprouting indoors!


Soak your seeds for several hours, even overnight, in room temperature water. These seeds are large!


  • Fill 4" pots with potting soil or a seed starting mix.
  • Plant 2 or 3 seeds in each 4" pot. The seeds should be planted about 1/2 inch deep.
  • Place your pots on a tray in a warm location or on top of a seed starting mat.
  • Keep the soil in the pots moistened, but not soaking wet.
  • Loosely cover the tray of pots with plastic, except when uncovered for watering. 


Most spinach seeds are not quick to germinate. It can take a few weeks before you see your little sprouts.

NEW ZEALAND spinach seeds, in particular, can take as many as 3 weeks to germinate... and not all at the same time. Not all of these seeds will germinate. That is why I like to put 2 or 3 seeds in each pot.


  • Once the majority of the seeds have germinated, remove the plastic cover. 
  • No need for the seedling heat mat either. 
  • Keep the plants moist and warm indoors in your sunniest window until they are a couple of inches tall. At this point, the plants will look sizable and healthy. 
  • Move the tray of plants out to a cold frame or greenhouse for a week or two. A protected, outdoor location will help the plants get accustomed to being cool at night. This is called hardening off. 
  • Meanwhile, prepare a raised bed of fertile soil for your spinach starts. In general, spinach likes a somewhat sweet soil. Because of the volcanic ash in our soil, you might want to till in some shell sand or store bought sweetener with your spinach soil to raise the pH of the soil a little. Go easy if you use lime! 


Here is a close up look at my NEW ZEALAND spinach starts when they were ready to plant outdoors in a raised bed.


So into the ground went the starts. If there was more than one plant in a pot, I separated them so each plant has its' own spot.
They were planted about 1 foot apart.

Notice there is a little bowl type depression around each plant. Spinach likes to be moist. So, whether from rain or a watering hose, the bowls fill up around each plant to insure that the roots get plenty of water.


Best to cover the entire bed loosely with a floating row cover. Although they do not bother NEW ZEALAND spinach, aphids like some spinach varieties. The floating row cover will keep out pests and it will increase the soil temperature significantly. No need to remove the floating row cover for watering. Rain and sun pass through the cloth. Keep the row cover in place with rocks or some other weight.


After a productive summer with lots of harvesting, here is a look at some of the NEW ZEALAND spinach plants in early fall. They are beginning to show their tiny yellow flowers. This is when I made a final large harvest, blanched it all, dehydrated it all and blended it into a powder for use throughout winter and spring.


There are so many varieties of spinach! I encourage you to try at least one new variety each year. 

HAPPY GARDENING!