Thursday, April 30, 2015

ZUCCHINI


Zucchini plants love to be warm and dry. It does not make much sense for anyone to get involved with growing zucchini in cool, wet Sitka. Personally, I only dabbled in this activity until meeting Cliff Lobaugh. We met at a conference in Juneau many years ago. Cliff had truly amazing gardens in a bay outside of Juneau on Admiralty Island. He explained his method of keeping his zucchini plants warm, dry and productive.

Cliff's method was simple:
- Start seeds indoors at the end of April or early May.
- Grow the plants in a warm place for the month of May. 
- Transplant outside when soil warms up around June 1st.
- Make a clear plastic tunnel for your zucchini plants.
- Don't water. Just let the rainwater seep in the sides.

                What???      Don't water???       Ever??? 

The DON'T WATER instruction was so difficult for me to follow! My nurturing instinct leads me to believe that the zucchini plants will die of thirst if I don't water them! 
Maybe they would not die. I have just never been able to make myself take that chance! 
So, I use restraint. When the soil looks very dry, I water lightly with a watering can containing warmish, not cold, water. 
I water the soil at the base of the plants rather than getting the whole plant wet.

And, look! Every year, our twelve or so zucchini plants have produced incredibly well! At least this many zucchini have been ready for harvest each week continuously from July well  into fall:


LET'S TAKE IT FROM THE BEGINNING

There are many varieties of zucchini from which to choose. You will need to decide which varieties and the number of zucchini plants you would like to grow.

Here are a few we have grown:
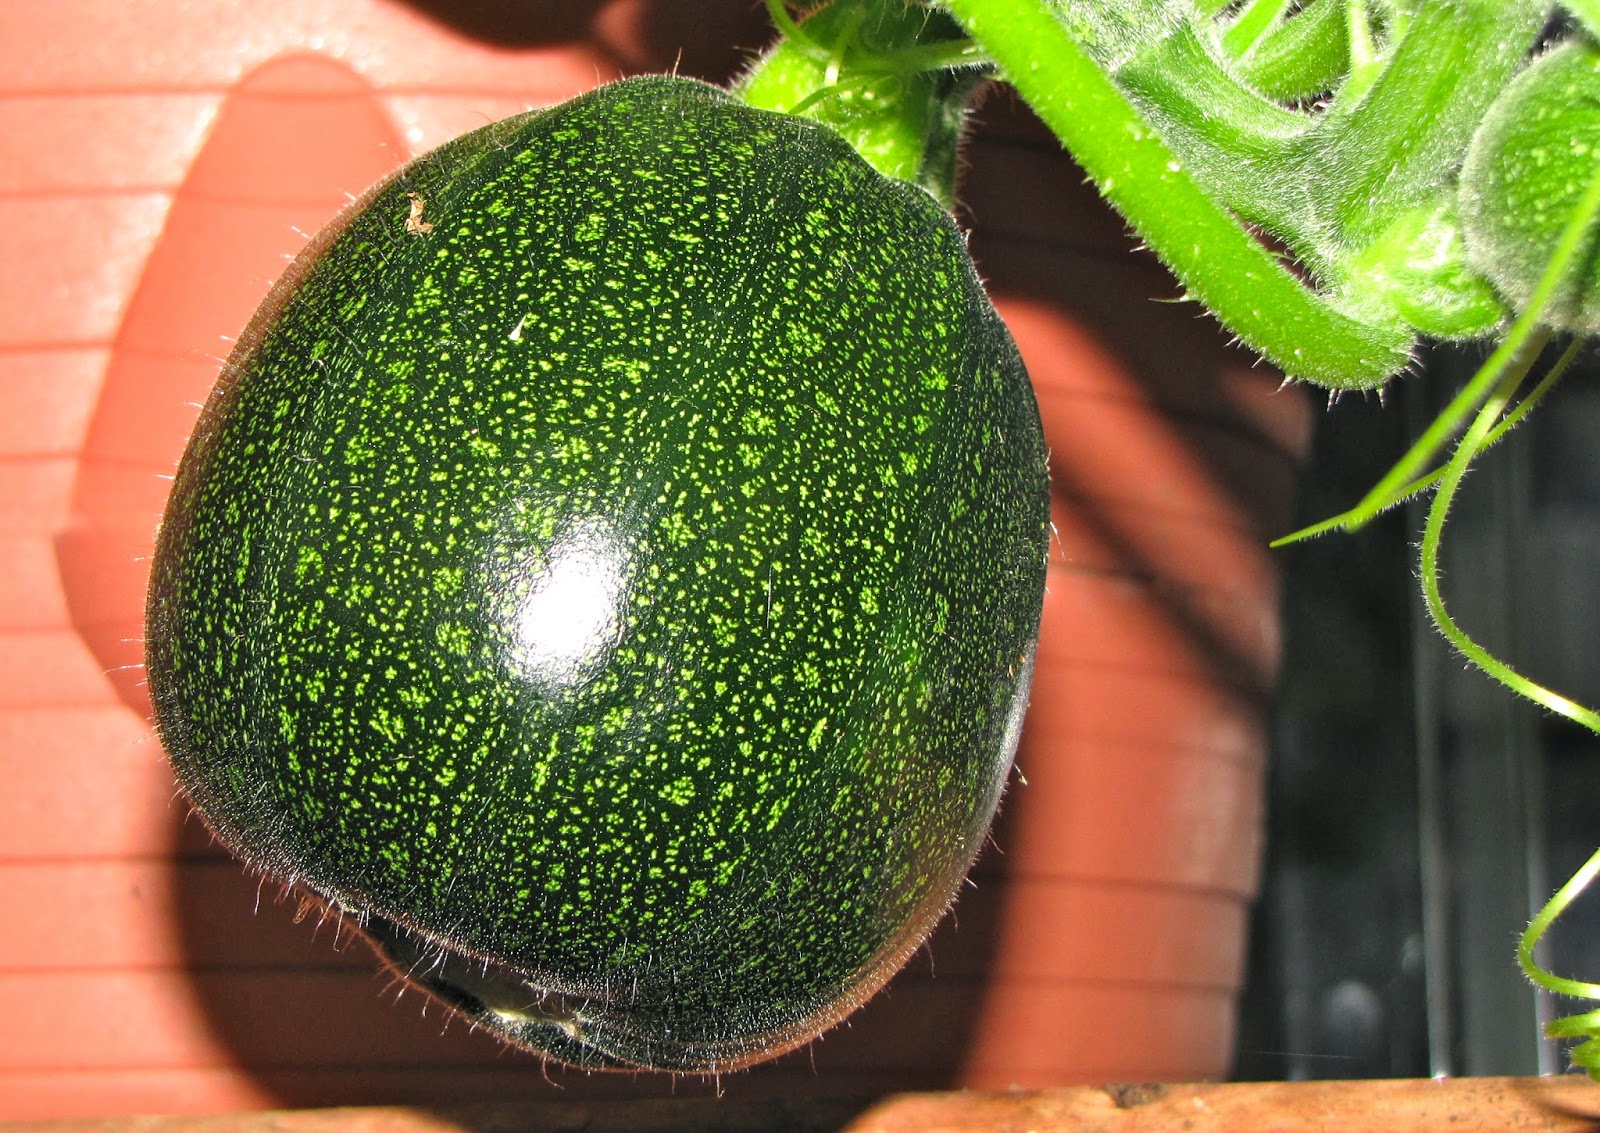
EIGHT BALL


BLACK BEAUTY


GOLD RUSH


THE PALE GREEN ZUCCHINI AT THE BOTTOM IS MY FAVORITE, CAVILI, MILD AND CREAMY.
THE YELLOW WITH THE LONG NECK, JUST ABOVE CAVILI, IS SUPERPIK.


Fill approximately gallon-sized containers with potting soil.
Bury two zucchini seeds about one inch deep, one on each side of the pot, in each of the gallon pots. You are planting two seeds in case one is a dud. It happens. If both seeds sprout into a plant, let them both grow in that container. It will be easy to separate them when it is time to plant them outside. 
Place the filled pots in a container or tray.


Now water each pot lightly. You want the soil moist, but not soaking. 


Cover the entire tray with plastic and place it on a seedling warming mat or in your warmest location.


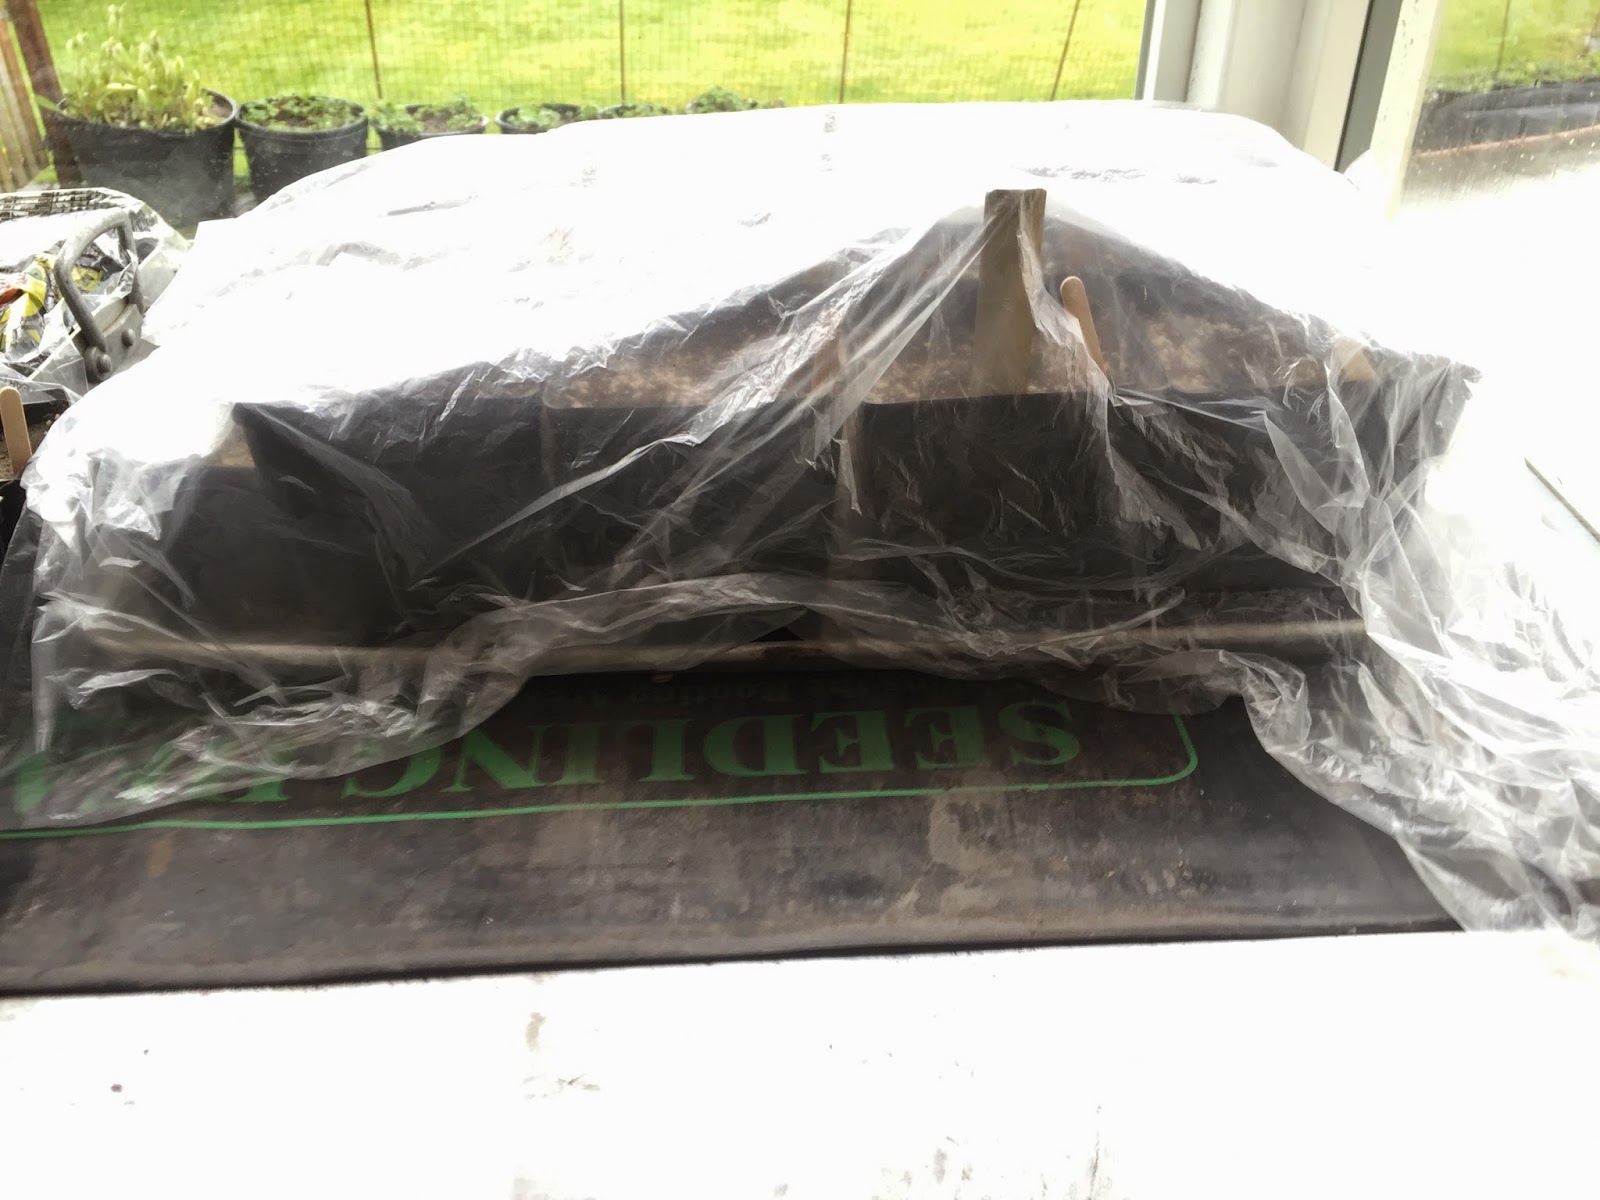
After only three days, the zucchini seeds are sprouting! It can take up to ten days.


After the zucchini seeds sprout, remove the plastic cover. No further need for the warming mat either.

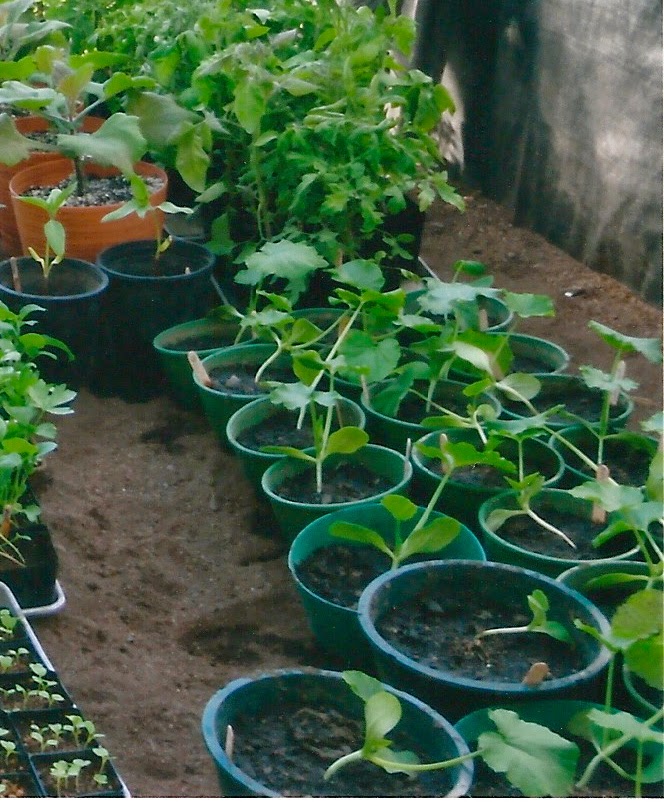
Let the starts grow for a month either indoors, in a cold frame or in a greenhouse. They will grow quickly and be quite large by June.


The soil is warm enough by June to plant the zucchini outdoors. When outdoor soil is too cold for zucchini, the base of the plant appears to be melting. The plant dies. 

Plant your zucchini plants in tilled, fertile soil about three feet apart. Water lightly after the transplant with water that is not cold, not hot, but just right. Warm.


Cover your zucchini plants with a plastic tunnel or something similar to protect the plants from rain, wind and cold. We used old water line tubing. The tubing is held in place with 2 foot pieces of old rebar driven into the sides of the garden. The tunnel is about 4 feet tall. We made thin slices of the tubing, made a cut in each and use them for clips or fasteners to hold the plastic in place.
ZUCCHINI PLANTS IN A PLASTIC TUNNEL.
THE PLASTIC IS RAISED ON SUNNY DAYS FOR FRESH, WARM AIR AND SUNSHINE.


It won't be long until you see lots of blooms.


Blooms are delicious! Once there is an abundance of blooms, pop blooms off the top of new fruits and pick off some of the blooms that are not attached to fruit. I also like to harvest the tiny fruits with flowers attached. 
Make up a tempura batter. 

Coat the blooms with the tempura batter. 

Saute in medium-hot olive oil or deep fry.

Cook briefly until golden and crispy on the outside.


It is best to harvest zucchini when it is small to medium in size in order to enjoy the best flavor and texture. If you are away from your garden for more than a week or have a well hidden zucchini that grows longer than it should... 
look what you might be harvesting!
BIGGER IS NOT BETTER WITH ZUCCHINI
LARGE ZUCCHINI HAS A TOUGH TEXTURE


So, what can you do with all those zucchini you will be harvesting? Besides sharing with friends and neighbors, there are some wonderful and unusual ways to consume these gems. 


When reading a new cookbook a few years ago


I learned about a kitchen gadget called a 
                       SPIRAL VEGETABLE  SLICER
This slicer is not as heavy duty as I'd like, but it is terrific!


- ZUCCHINI NOODLES -
Among its many uses, the above slicer quickly and easily turns zucchini into spaghetti noodles!
An average sized zucchini makes about one serving of noodles. Once you have twirled as many noodles as you will need for your meal, simply steam the noodles briefly in a pan with a little water. Drain. Make a bed of noodles on a plate. Add your favorite sauce and toppings. The noodles have a great texture and are delicious.
SPAGHETTI (MADE FROM ZUCCHINI) WITH STEAK AND OLIVES


Look what became available recently! This is the latest attachment available for KitchenAid mixers. How multi-purpose and wonderful!


- ZUCCHINI SOFT TACO SHELLS -
Wow!!! Is this ever a delicious, nutritious way to eat zucchini! The tacos are simple to prepare. 

Made up almost entirely of shredded zucchini, it is a healthy treat. Eat, as is, as a snack. Use as a soft taco with filling. 
For a filling this time, I rolled small pieces of deer meat in flour and sauteed in olive oil.
 
Simply place several cooked pieces of meat inside the soft taco. Add more goodies if you like. Fold it over and eat!  Seriously good!!!


You can find the ingredients and directions for making these delightful taco shells by clicking on the link below:


- DEHYDRATED ZUCCHINI -
Want to enjoy your zucchini all through winter without freezing? DEHYDRATE! You will likely be surprised at how sweet and crunchy dehydrated zucchini slices are. We have found them to be popular with young and old. 
- Eat as a snack. 
- Use as a chip with dip. 
- Crumble and add to soups, chili etc. It will rehydrate. 
- Turn into powder in a blender and add to green drinks!
DEHYDRATED YELLOW ZUCCHINI IS UNUSUALLY DELICIOUS
WITH A SWEET, NUTTY FLAVOR
Keep dehydrated vegetables in an air-tight container in a cool, dark location.


SOME OF THE ZUCCHINI VARIETIES WE ARE CURRENTLY GROWING OR HAVE GROWN IN THE PAST:

ALEXANDRIA
BLACK BEAUTY
BLACK HAWK
CASERTA
CAVILI
COSTATA ROMANESCO
COURGETTE
DUNJA
EIGHT BALL
EMERALD DELIGHT
FORDHOOK
GIAMBO
GOLD RUSH (YELLOW)
JACKPOT
PARTENON
SUNBEAM
SUNGREEN
SUPERPIK (YELLOW)
ZEPHYR


HAPPY GARDENING!!!


Thursday, April 23, 2015

POTATOES

It's April. 
The weather might be wild and crazy, but go ahead! 
Start a plan to grow potatoes. 
Yes, grow your own! 
You will be glad you did.

A VARIETY OF HOME GROWN POTATOES READY TO BAKE WITH A CHICKEN


If you start potatoes in Sitka any time from mid-April through early June, you will likely have a lovely crop by fall.

You will need to:
- acquire seed potatoes 
- prepare a location 
- plant your seed potatoes!


There are thousands of varieties of potatoes in the world. Textures and flavors abound. 

Potatoes come in a variety of colors, sizes and shapes: 

CHERRY RED


CARIBE


RUSSET


Each variety has its own unique flower... 
PURPLE MAJESTY


BRIGUS

TO-LE-AK


And, after doing a little research, you will learn that there are potato varieties, including the two below, that mature early...
ROSE GOLD

BRIGUS


ACQUIRING SEED POTATOES
So, which potato varieties should you grow? Where do you find seed potatoes? Fortunately, there were several Sitka gardeners successfully growing potatoes when I asked those questions long ago. They cheerfully shared seed potato to get me started. Over the years, growing a wide variety of potatoes has been lots of fun for the entire family.

Nowadays, there is potato information readily available from many sources including local gardeners, the cooperative extension services, libraries, catalogs and the internet. And, best of all, there are businesses in Sitka selling high quality, certified seed potatoes. They sell certified seed potato to help prevent the introduction of disease into your  garden soil. In fact, just recently, I saw attractive selections of certified seed potato at Penny Brown's Garden Ventures and True Value. Most likely, the varieties available for sale here in town were all determined to be suitable for our climate. These businesses usually have information and literature describing the seed potato varieties they are selling.

Something to think about. If you do not have your own source of seed potato, you will need to buy it.  When purchasing seed potato, the inclination will be to purchase the largest potatoes. Rather than purchasing and cutting up large potatoes, consider buying the small to medium sized potatoes. In this case, you will use one potato to grow one plant. This might be easier and more economical. If you plant a large seed potato, it will grow one plant just fine, too. 


If you want to grow more than one potato plant from a large seed potato, cut the seed potato into pieces with at least two eyes per chunk. (You actually only need one eye to grow a plant. The second eye is for back-up). Then let the pieces dry out a little indoors in a dry location for 3 or 4 days before planting. The large, whole seed potato above was cut into three pieces. Each of the three pieces has at least two well developed eyes.


CHOOSING AND PREPARING YOUR POTATO PATCH
You know what? Potatoes are so eager to grow, that any crazy sounding method of growing potatoes you've heard about is probably valid and worth a try!

We tried several different approaches throughout the years. One summer we piled some extra sandy soil into a four foot hill. We dug deep holes all around and buried a variety of seed potatoes in the holes:


It was coincidentally a good year to pile the sandy soil high. It rained nearly every day! The hill drained well. Excellent results. Over two hundred beautiful, large, delicious potatoes from this hill alone.


But, in this post, let's go with a basic, conventional approach to growing potatoes.

It would be best if you choose a location that will face the sun when it shines. So, if you have an east, south or west facing area, go with that. You will probably do well enough with north facing, but not if it is full shade.

Potatoes are best grown in slightly acidic soils. A lot of our soil here in Sitka is naturally acidic because of the inclusion of volcanic ash. So, the good news is that your yard soil will probably get you off to a good start... minus the weeds and large rocks.

Next, the goal is to have fertile soil. We have often satisfied this need by gathering seaweed in the fall from the high tide line of beaches...


There are leaves, needles and other goodies mixed in with the seaweed... 


We layered this seaweed mix alternately with fish waste... heads and carcasses from one of the seafood plants or dead, spawned out salmon. We made a big pile of it all in one of our large garden beds. We covered the compost pile with a tarp or old construction cloth...


We let it compost all through the winter. 
When growing potatoes, it is important that organic matter is well rotted or decomposed.
We turned the pile every month or two. Come spring, it was a beautiful sight to see. Alaskan black gold.  Perfection!

Finally, soil needs to drain well. Many years ago, we were able to acquire a large quantity of sand when a local beach was dredged.  More recently, we were lucky to have a friend who discovered a large pocket of sand on his property when he was prepping to build a house. Lots of that sand ended up in our gardens! If you don't have a readily available source of sand, it can be purchased from a sand and gravel business here in Sitka. 

So, here is the mixture... plenty of sand, your own yard soil and totally decomposed organic matter. Shoot for 1/3 of each.
For us, this has been a terrific blend for growing potatoes! 


In order to mix everything together thoroughly in the large potato garden, we used a rototiller. A small garden can easily be turned with a pitch fork or shovel.


Here is the potato garden after it has been tilled...


We planted a row of each of these potatoes:
ALASKA ROSE IS A LARGE POTATO WITH RED SKIN AND WHITE FLESH.


BRIGUS IS A VERY LARGE POTATO WITH PURPLE SKIN AND WHITE FLESH.


CARIBE IS A VERY LARGE POTATO.
THE SKIN IS WHITE AND SPECKLED WITH PURPLE. 

THE FLESH IS WHITE.


ROSE GOLD POTATOES ARE VERY LARGE 
WITH PINK SKIN AND GOLD FLESH.


YELLOW FINN POTATOES ARE MEDIUM IN SIZE 
WITH BROWN SKIN AND YELLOW FLESH.


We divided the potato garden into five rows... one row for each of the potato varieties in the above photos. We did not make raised rows. The entire garden stays flat at this point in time. Each row was labelled with one of the five potato varieties. We dug holes about 10 inches deep, about 2 feet apart the entire length of each row. One seed potato was placed in each hole. The hole was filled in with the soil that had been removed.


We made a separate, large potato patch for our favorite variety: 


THIS IS OUR ALL TIME FAVORITE POTATO!
IT IS MEDIUM IN SIZE 

WITH DARK PINK SKIN AND YELLOW EYES. 


THE FLESH IS ALMOST FLORESCENT YELLOW. BEAUTIFUL!


IT IS VERSATILE IN THE KITCHEN WITH EXCELLENT FLAVOR.

WE ACQUIRED THIS POTATO ABOUT FIVE YEARS AGO, BUT DID NOT KNOW THE VARIETY. AFTER CONSIDERABLE RESEARCH, WE SETTLED ON INCA BELLA.
TO OUR SURPRISE, WE RECENTLY SAW A NEW ALASKAN BRED VARIETY OF SEED POTATO FOR SALE LOCALLY THAT LOOKS IDENTICAL TO WHAT WE CALL INCA BELLA. 
THE NAME IS 'MAGIC MYRNA.'
SO, WHATEVER THE NAME, IT IS A WONDERFUL POTATO!


Our potato patches were covered with floating row covers. Three reasons for using floating row covers:
  
1. to discourage dogs, cats and other critters from
    walking and digging in the garden 
2. to keep insects out  
3. to increase the soil temperature


After about a month, the floating row cover is removed for weeding. 


When the potato plants have grown 12 inches or so, it's time to dig soil from either side of the rows and pile it up around the base of the potato plants. (This results in lower pathways between each row improving drainage). This practice generally increases the number of potatoes growing on each plant. Remember to replace the floating row cover.


As early as July, depending on the variety and weather conditions, you will have some potatoes sizable enough to harvest! Don't pull out the entire plant! Leave the plant to continue growing and simply reach down into the soil at the base of the plant and feel around for a potato or two. Pull the potato out of the soil. Repeat this with other potato plants until you have as many potatoes as you need at the time.


More often than not, it begins to rain heavily and regularly beginning in August or September. If you are not ready to dig up and store your remaining potatoes, I would suggest covering the plants loosely with a large clear/semi-clear plastic or tarp. Use hoops if you have them. This will hold in a little heat and prevent prolonged soaking.


Depending on the variety, sometime in September or October, the potato plants will start turning yellow and look straggly. 


When this happens, it is a good idea to harvest and store your remaining potatoes.
WE OUTGREW OUR FIRST GREENHOUSE SEEN IN THE BACKGROUND.


WE REPLACED THE OLD GREENHOUSE WITH A FAR MORE SPACIOUS NEW ONE. MR. WELSH WORKED LONG AND HARD TO BUILD US NOT ONLY A SPACIOUS GREENHOUSE, BUT ALSO AN ATTACHED COVERED GARDEN. THE COVERED GARDEN IS USEFUL FOR GROWING SOME FRUITS, VEGETABLES AND FLOWERS THAT PREFER A DRIER CLIMATE THAN SITKA PROVIDES. A BIG THANK YOU TO OUR NEIGHBOR, JIM HARRIGAN, WHO GAVE US LOTS OF HELP WITH THE WELDING.


We store our potatoes by digging trenches a foot or two down into the soil floor of our greenhouse. We sort the potatoes by variety and size and bury them in the trenches. A foot or so of depth will prevent freezing when temperatures drop. The potatoes are easily accessible and dry all winter long. We save the potatoes we want to use in spring for seed potato. 

Other potato growers I know here in Sitka have been clever and creative with potato storage. The hold of their boat! A root cellar that looks like a hobbit habitat! A barely heated tool shed/workshop! Ask around and you will probably hear as many wonderful ideas for storage as their are gardeners. So interesting and fun.


EATING POTATOES
You undoubtedly already have excellent methods and recipes for cooking and eating potatoes... baked, roasted, scalloped, fried, mashed, hash browns. The possibilities are almost endless. Potatoes are so versatile.

Several years ago I discovered the hand operated spiralizer. Then I learned about a spiralizer attachment for my Kitchenaid mixer. I love it.

You can peel the potato or not.

Follow the simple instructions for using the spiralizer.


Cook a handful of the curly potatoes at a time in your favorite vegetable oil. Hot... about 375 degrees. Cook until crispy.


Drain on a paper towel.


Sitka style deer sausage with pickled beach asparagus... and homegrown fries!


SOME OF THE POTATO VARIETIES WE HAVE GROWN:
ALASKA ROSE
BINTJE
BRIGUS
CARIBE
GERMAN BUTTERBALL
INCA BELLA
KENNEBEC
MAGIC MYRNA
OZETTE
PURPLE MAJESTY
RED ROSE
ROSE FINN
ROSE GOLD
RUSSETT
RUSSIAN BANANA
SHEPODY
TLINGIT
TO-LE-AK
WHITE RURAL NEW YORKER
YELLOW FINN
YUKON GOLD